- 02/02/2017
- 2 Min Read
- By: Michael Hallock
P1 Volvo Turbo Control Valve (TCV) Replacement
Boost issues can be frustrating. They can also be difficult to track down, especially on a Volvo where there are many sensors, hoses, and electrical components. If you are experiencing sporadic boost, consistently low boost pressure but reliable vacuum, or occasional spikes in boost pressure, the likely culprit is the Volvo Turbo Control Valve (TCV).
Please note that the Turbo Control Valve may not be the problematic component. However, TCV failure is common for vehicles over 10 years old or 100k miles. Often times, a failed TCV will store a code which can be read using a Volvo specific scan tool.
What is a turbo control valve? This electrical component controls the turbo wastegate using vacuum pressure and signals from the car's electronic control module (ECM). Prior to any performance modifications or software tuning, the TCV must be functioning properly. It can be solely responsible for calibrating smooth boost delivery and tweaking the torque curve.
There are multiple turbo control valves available, which is the best to purchase? Reference FCP Euro's guide for finding parts compatible with your car. For P1 Volvos, you may either choose from an OEM (or OEM equivalent) turbo control valve or the performance TCV sold by Elevate. A performance TCV is ideal for a tuned car running higher boost. However, an original Volvo TCV will still function properly for extreme boost conditions. The only reason to replace the turbo control valve is if it has failed and boost becomes inconsistent.
The factory TCV is attached to a bracket near the turbo. Most aftermarket TCVs provide brackets for installation against the firewall or strut tower, away from the heat of the turbo. While turbo heat is not necessarily problematic for a stock tuned vehicle, excessive heat can still cause premature failure. Whether you are replacing your TCV with an OEM unit or an aftermarket option, I strongly recommend relocating it at this time.
Necessary Tools for TCV Replacement:
- small pliers for the quick release hose clips
- jack and jack stands or ramps
Additional Parts & Tools for Performance TCV Replacement and/or Relocation:
- extra 3 or 4mm inner diameter vacuum hose
- snips for cutting the hose
- metric socket set (if your performance TCV includes a nut for mounting to the fire wall)
- zip ties and foam tape (if you are relocating an OEM TCV)
- straight hose connector (see step 6 below)
Procedure:
-
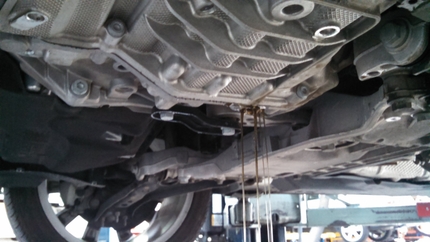
Lift the front of the vehicle on jack stands or ramp. The TCV is most easily accessed from under the car, so make sure you have sufficient working room. Please note that the turbo can remain hot for hours after a vehicle has been driven; make sure everything has cooled for a sufficient amount of time before beginning work.
-
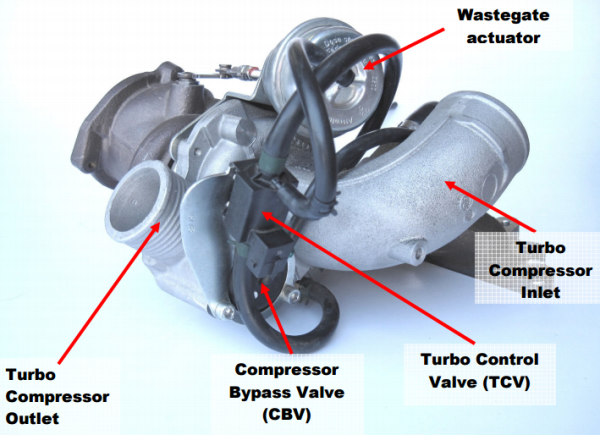
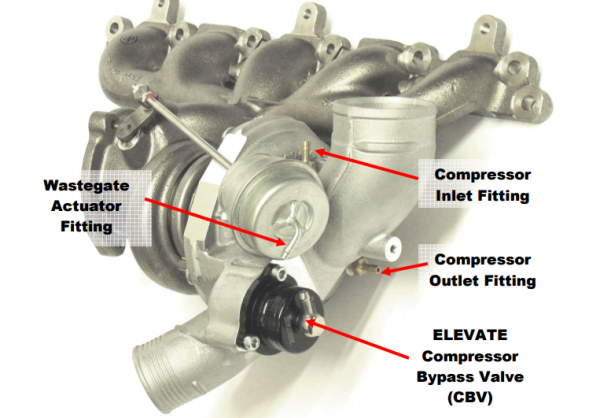
Familiarize yourself with the turbo components and hoses. It can be challenging to clearly view the TCV when mounted on the car, but the following picture from Elevate's performance TCV installation guide provides a clear view.
When installing a new TCV, replace one hose at a time. It is easy to get the hoses confused if multiple hoses are disconnected at once. Incorrectly hooking up a TCV will cause major boost problems and may even prevent the car from running properly.
-
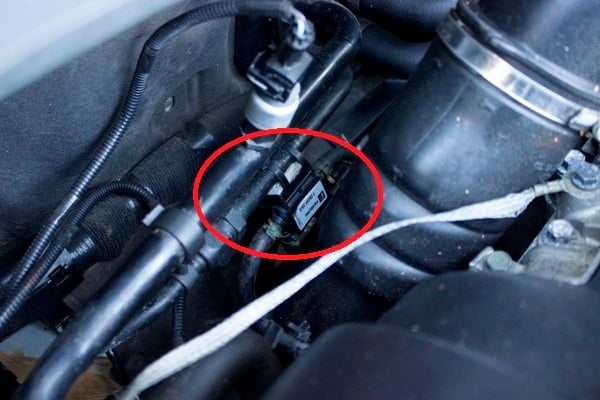
Remove the TCV by pulling it straight off of its bracket. This may require a little force.
-
Disconnect the electric push-release clip.
-
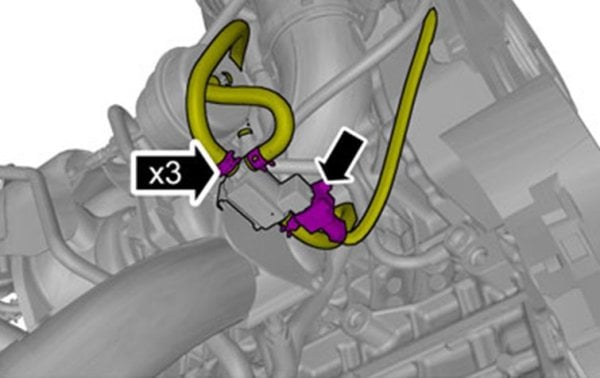
If you are simply replacing the TCV, use pliers to disconnect the quick releases for the vacuum hoses, highlighted purple in the Volvo image below. Remove the hoses from the old TCV, and reconnect them onto the new TCV.
-
If you are relocating the TCV, you may need to replace some of the vacuum hoses with extended hoses to reach your new mounting location. The wastegate hose is fairly accessible, but reaching the compressor inlet fitting can be challenging in the tight working space. If you are unable to reach the fitting, you may cut the existing hose and use a straight hose connector to attach the extended hose.
-
With the hoses all transferred over to the new TCV, position it in the new mounting location. The performance TCV by Elevate includes a nut to mount the TCV to one of the firewall studs.
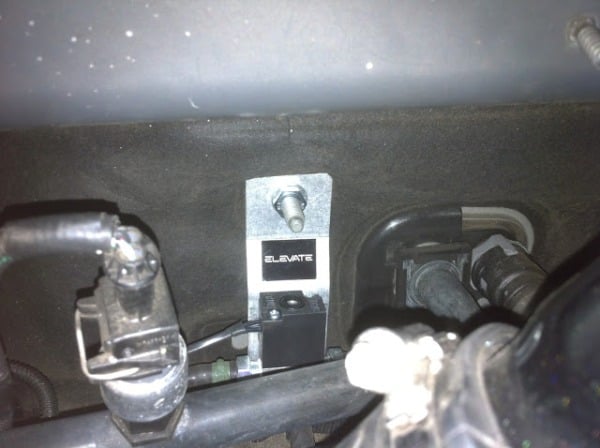
If you are relocating the stock TCV, you may attach it to the AC lines using zip ties. Before tightening down the zip ties, place a piece of foam tape between the TCV and the AC pipe to prevent it from rattling.
-
With the TCV secured in place, reconnect the electrical connector.
-
Upon starting the vehicle, your ECM will need to relearn the new TCV. Go for a calm drive, not pushing into boost or going beyond half throttle for at least 2 miles. Then, slow accelerate to wide open throttle and begin driving spiritedly to confirm boost builds steadily and holds strong.
In the event that the car stumbles or boost becomes more sporadic, you may have mixed up the vacuum lines during installation. Reference the pictures above to confirm everything is installed properly. If boost continues to be problematic, the issue may lay elsewhere.


