Mercedes Belt Replacement and Tensioning
It is often very easy to neglect what we can’t see. “Out of site, out of mind,” but don’t let that be your motto for success, especially if you own a classic car. While newer cars can go many more miles without looking under the hood, it is a good idea, to lift the hood regularly and check things out.
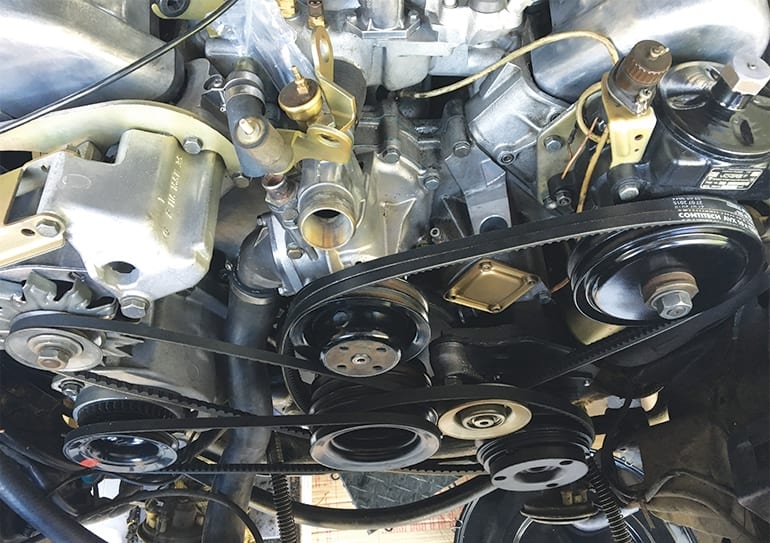
One specific item to check yearly, are the belts. In the case of the 1975 450SL Mercedes-Benz, there are five belts to take a good look at. As you can see, one belt serves the A/C compressor, one belt serves the air or smog pump, one belts serves the alternator and two belts serve the power steering and water pump.
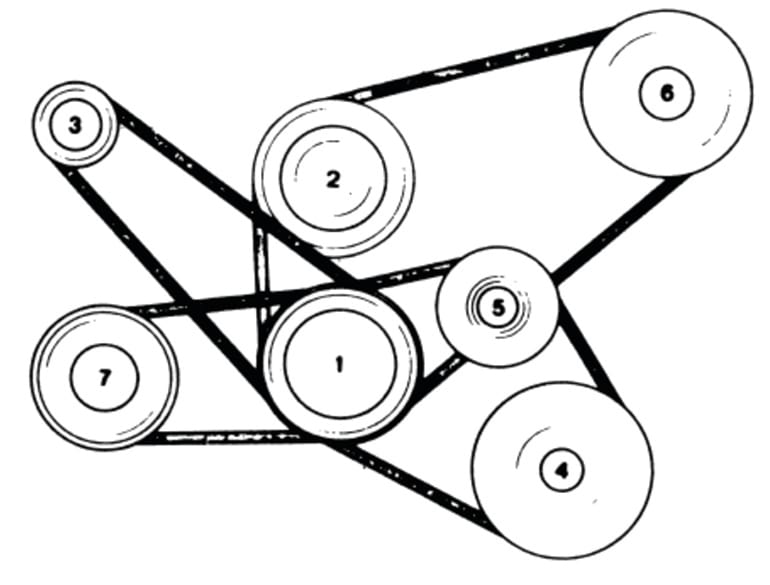
Image of Mercedes 450SL V-Belt Configuration:
- Crank Pulley
- Water Pump/Fan 3.
- Alternator
- A/C Compressor
- Tensioner
- Power Steering,
- Air Pump.
When ordering your belts, make sure you order based on your chassis or engine number. I
personally choose Continental ContiTech belts.There are many variants and belt size can andwill very year to year and by chassis. As it was with my ’75 450SL, I ordered the “correct” belt size based on chassis and engine number for my air pump and discovered, my particular car required the “California” engine belt size. Why? Who knows, but all pulley and part numbers were correct for my car. Go figure. Unfortunately I was unable to measure the old belt as it was not on the car when I acquired it. The smog pump was very broken.
If you are changing all your belts, which is a good idea, it will be much easier to accomplish this job if you are to remove the fan, shroud, and upper radiator hose.
It truly doesn’t matter where you start your process, but the following accessories will need to be loosened to remove the belts. Air pump, alternator, power steering pump and A/C compressor belt tensioner. DO NOT loosen any bolts that hold the A/C compressor or water pump.
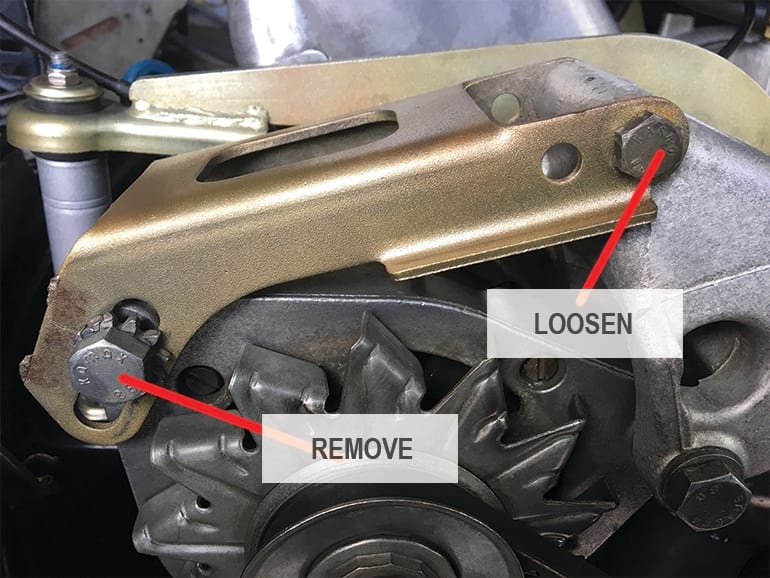
Mercedes Alternator V-Belt Replacement and Tensioning
Two bolts on the alternator mounting bracket will need to be loosened to allow the accessory to slightly rotate. The bolt shown however will have to be removed to allow enough slack to slip the belt from the pulley.
Mercedes Air Pump V-Belt Replacement and Tensioning
To loosen the air (smog) pump belt loosen the following bolts to allow the pump to move freely within the bracket.


Mercedes A/C Compressor V-Belt Replacement and Tensioning
To remove the A/C compressor belt, you will simply need to loosen one 17mm bolt at the
tensioner. The bolt is directly behind the tensioner
Once every thing is sufficiently loose, you can remove the belts and then slip the new belts on in the reverse order, starting with the power steering pump, etc.
When the new belts are in place, I would suggest tensioning the air pump belt first. Reason being, the alternator has to be removed in order to get to the tensioning nut at the rear of the air pump.
Now the fun and easy part. You will be required to have a belt tensioning “scale” to do this job properly! Why thumbs are good for hitchhiking they do not serve as an accurate measuring device to set the belt tension. Why is this so important. If the belt is to loose, there may be slipping of the belt causing excess wear and causing the accessory not to function as it should. On the other hand, if it is to tight it can put considerable strain on the accessories internal components, such as bearings etc.
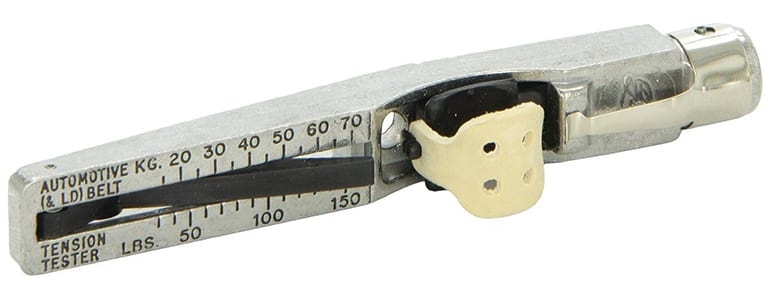
Mercedes-Benz suggests that a “Krikit” V-belt tensioner gauge be used—cheap, simple and
accurate. These are available by Gates® for about $14. **NOTE**: There are two variants of the gauge. One is Gates part number 91107 (Krikit I) for tensions between 20-70kg and 91132 (Krikit II) for tensions between 50-150kg. **YOU MUST USE 91107 or the Krikit I**. Mercedes requires the 9.5mm (10mm) belts to be measured at 30kg and the 12.5mm (13mm) at 50kg on the gauge for new belts. Should you be returning belts that are in good condition, but have been used, Mercedes states the tension specs are as follows: 20-25kg for the 9.5mm (10mm) belts and 40-45kg for the 12.5 (13mm) belt.
To use the Krikit properly is not difficult at all, but does require a specific operational procedure to obtain an accurate reading.
To read your V-belt tension gauge do the following:
- Begin by tensioning the belt to where it will only flex less than half inch under the pressure of your finger or thumb (yes, it’s OK to use one of your digits at this stage). If you have too much flex in the belt to begin with, you will obtain a false reading.
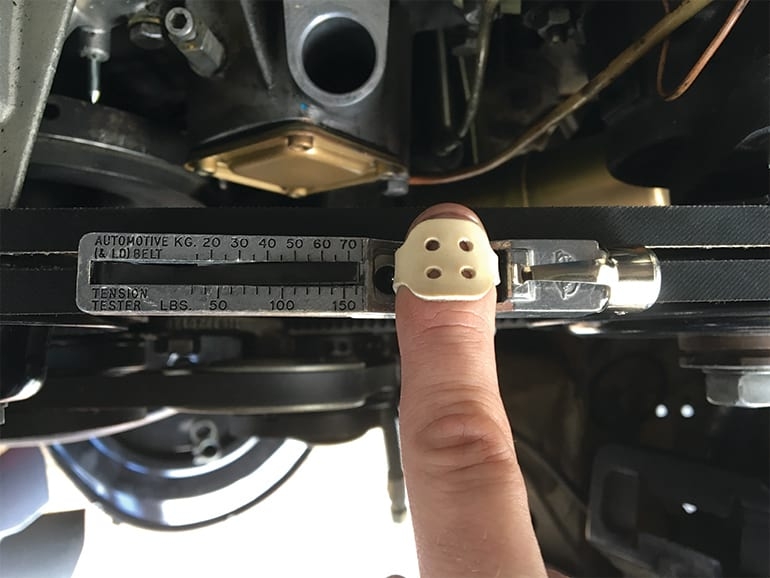
Next, place the rubber finger “ring” over your index finger as shown.
Now, place the scale as shown as close to the center of the belt span as possible. Use the lip on the gauge against the leading edge of the belt to align. When aligned, press STRAIGHT down and SLOWLY! DO NOT rock side to side or back and forth when pressing. Be sure the plastic indicator is pressed flush with the top of the scale before you begin.
As you press, the indicator will begin to rise. The tighter the belt the less the indicator will rise, the lighter the tension the more it will rise. As you continue to press, assuming the belt is tight enough you will hear and feel a click from the gauge. At the point the Krikit clicks, you will want to keep your finger motionless and read the indicator. It is best to do this two or three times in a row to make sure you are getting an accurate reading. If you press too quickly, you will most likely over shoot your mark causing the belt to be tensioned to loosely. Although extremely simple, these gauges are very accurate when used properly.
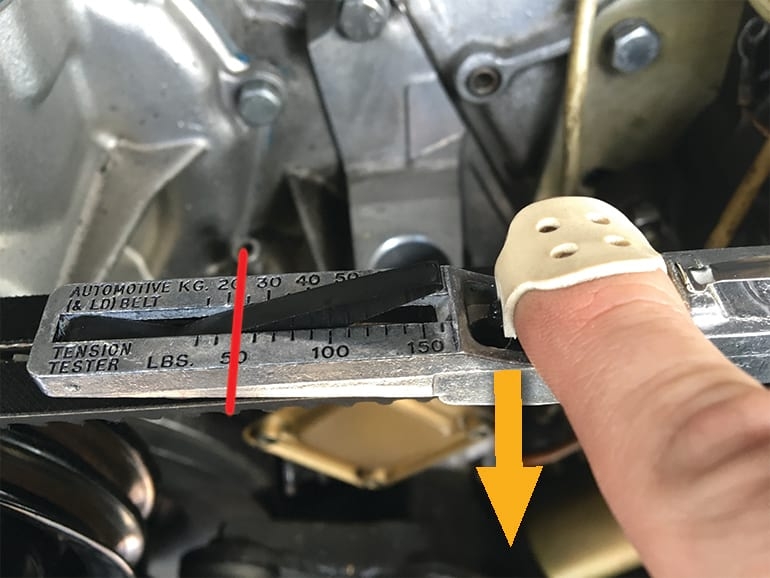
When reading the gauge, you will be reading the leading edge of the gauge as shown. The
right hand edge of the red line on the image above indicates the exact place to measure and is reading at just under 25kg—too loose for this belt. In this particular case, the power steering unit will need to be readjusted to get this belt tighter.
Repeat this process for all 5 belts or how ever many you have, until each is at the proper
tension. Once the belt is at the proper tension, be sure to go back and check all the bolts used for the tensioning process and be sure they are all sufficiently tight. One loose bolt will allow the set tension to slip over time from engine and road vibration.
NOTE: The Krikit v-belt tension gauge can be used on any belts that need to be tensioned to spec.
Once everything is tightened down, reinstall your fan, shroud, and upper radiator hose, top off the coolant and start the car. Make sure you do not hear any unusual noises and the the belts are tracking properly in the pulley groves. Recheck tension after running the car for several days.
Potential parts needed:
- A/C Compressor Belt Tensioner and or Pulley Assembly
- [V-Belts](https://www.fcpeuro.com/products/mercedes-drive-belt-kit-contitech-450slbelt)
- V-Belt Tension Gauge
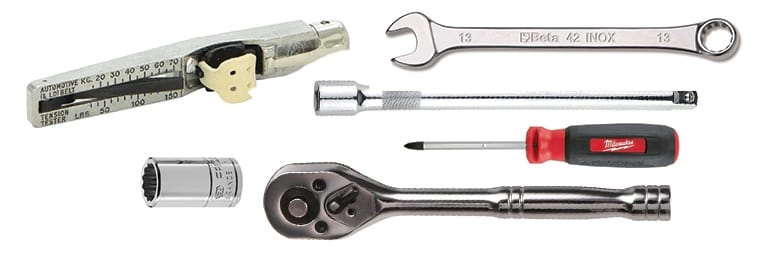
Helpful Tools